Chalk Paint – Why I Love It.
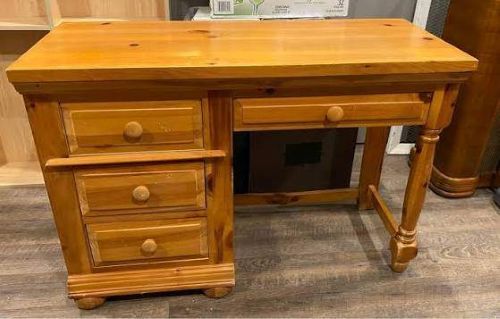
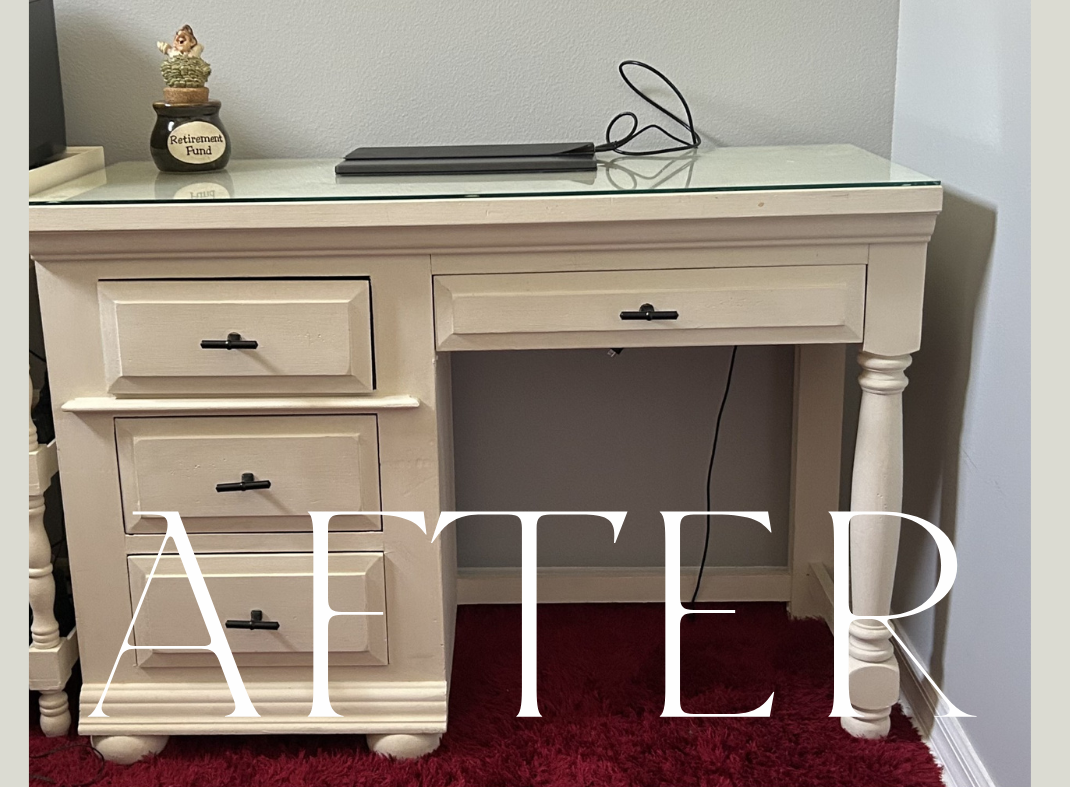
Transforming furniture on a budget doesn’t get better than this! I picked up this vintage pine desk for just $35 and gave it a complete makeover using a fresh coat of chalk paint, updated hardware, and a custom glass top. With a little creativity, an inexpensive thrift store find becomes a stylish, high-end workstation that boosts guest appeal and makes your listing stand out in photos.
Using chalk paint kept the process fast, approachable, and fun. Here is why it is the ultimate DIY game-changer—plus the one non-negotiable step you can’t skip.
Why Chalk Paint is a DIY Favorite
- Zero Prep Work: Skip the tedious sanding and priming. Chalk paint adheres effortlessly to almost any surface—wood, metal, plastic, laminate, and even brick.
- Highly Forgiving Formula: Its thick, self-leveling consistency hides brush strokes naturally and dries in just 20 to 30 minutes.
- Effortless Distressing: The signature velvety texture makes light sanding along edges and corners simple, allowing you to achieve an authentic vintage, shabby-chic, or farmhouse aesthetic.
- Low Odor & Easy Cleanup: Being water-based with low VOCs, it avoids harsh chemical fumes and cleans up with basic soap and water.
The Golden Rule: Always Seal Your Finish
Because chalk paint cures to a ultra-matte, porous texture, leaving it unsealed makes it vulnerable to moisture, skin oils, and scratches. Applying a protective top coat is essential for a long-lasting finish.
- Furniture Wax: Clear, Dark, Black, or White waxes (like those from Annie Sloan) rub directly into the paint with a rag or wax brush. The wax sinks in, seals the surface, and leaves a gorgeous, satiny sheen.
- Polyurethane or Poly-lacquer: For high-traffic pieces like desk tops or kitchen cabinets, opt for a clear, water-based poly-lacquer for maximum durability against daily wear and tear.